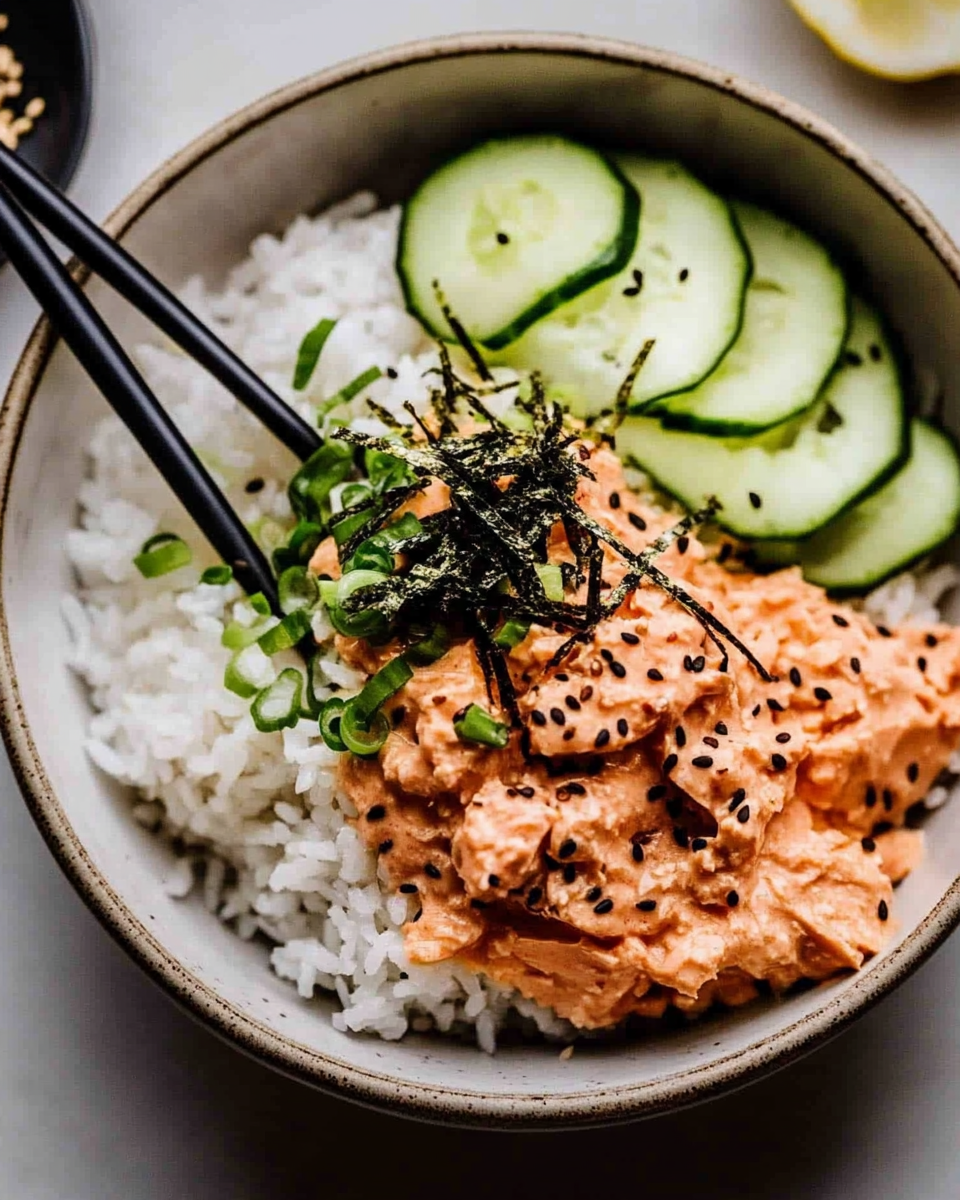
A Tuna Rice Bowl is a simple yet delicious meal that combines canned tuna with a creamy, spicy sauce, served over warm rice and finished with flavorful toppings. Inspired by Hawaiian and Japanese flavors, this dish offers a perfect balance of spice, umami, and texture. Whether you need a quick lunch, an easy dinner, or a budget-friendly meal, this recipe is an excellent choice.

Why You’ll Love This Recipe
- Fast and Easy – Ready in just 5 minutes, making it perfect for busy days.
- Budget-Friendly – Uses affordable pantry staples like canned tuna and rice.
- Packed with Flavor – The combination of sriracha, soy sauce, and sesame oil creates a rich, umami-packed dish.
- High in Protein – A satisfying meal with plenty of protein from tuna.
- Customizable – Easily adaptable with different toppings and ingredients.
Preparation Phase & Tools to Use
Essential Tools and Equipment
- Mixing bowl – To combine the tuna mixture.
- Fork or spoon – For mixing and breaking up the tuna.
- Rice cooker or saucepan – To prepare the rice if it’s not pre-cooked.
- Serving bowl – To assemble the dish.
Preparation Tips
- Use freshly cooked rice for the best texture, but if using leftover rice, warm it up slightly before serving.
- Drain the tuna well to prevent excess liquid from making the rice soggy.
- Adjust spice level by adding more or less sriracha, depending on your preference.
- Chill the tuna mixture for a few minutes if you prefer a refreshing contrast to the warm rice.
Ingredients (Serves 1)
- 1 ½ cups cooked white rice
- 1 (5-ounce) can tuna, drained (oil-packed preferred for richer flavor)
- 2 tablespoons mayonnaise (Kewpie Japanese mayonnaise recommended)
- 2 teaspoons sriracha
- 1 teaspoon rice wine vinegar
- 1 teaspoon toasted sesame oil
- ½ teaspoon soy sauce
Optional Toppings
- Black sesame seeds – Adds nuttiness and crunch.
- Furikake – A Japanese seasoning blend that enhances umami.
- Cucumber, sliced – Provides freshness and a crisp texture.
- Nori (seaweed), cut into strips – Gives a subtle ocean-like taste.
- Green onions, sliced – Brings mild onion flavor and color contrast.
Step-by-Step Directions
1. Make the Tuna Mixture
- In a small mixing bowl, add drained tuna, mayonnaise, sriracha, rice wine vinegar, sesame oil, and soy sauce.
- Stir well until all ingredients are fully combined and the mixture is creamy.
2. Assemble the Bowl
- Place warm cooked rice in a serving bowl.
- Spoon the spicy tuna mixture over the rice.
3. Garnish & Serve
- Sprinkle with black sesame seeds, furikake, cucumbers, nori strips, or green onions.
- Serve immediately and enjoy.
Recipe Notes & Variations
- Make It Healthier: Use brown rice or cauliflower rice for a lower-carb option.
- Increase Protein: Add a soft-boiled egg or extra tuna.
- Extra Crunch: Top with crispy onions or tempura flakes.
- More Spice: Drizzle with extra sriracha or chili crisp.
- Different Sauces: Swap mayonnaise for Greek yogurt for a lighter version.
Serving Suggestions
While this dish is rich and flavorful, adding complementary sides can balance the meal. Here are eight side dish ideas that pair well:
- Steamed or Roasted Vegetables – A mix of broccoli, carrots, or asparagus provides a fresh contrast. Lightly season with salt and olive oil for added flavor.
- Garlic Butter Green Beans – Sautéed with garlic and a touch of butter, green beans add a crisp texture to the dish.
- Simple Side Salad – A mix of fresh greens, tomatoes, and cucumbers with a lemon vinaigrette keeps the meal light and refreshing.
- Coleslaw – A tangy, creamy coleslaw cuts through the richness of the dish and adds a bit of crunch.
- Crusty Bread – A warm baguette or dinner roll is great for soaking up any extra sauce or juices from the chicken and rice.
- Greek Yogurt Cucumber Salad – A cool, refreshing side made with yogurt, cucumbers, and dill balances the warmth of the dish.
- Grilled Corn on the Cob – The smoky sweetness of grilled corn adds a delicious contrast to the savory flavors.
- Roasted Sweet Potatoes – Slightly caramelized roasted sweet potatoes bring a hint of natural sweetness to the meal.
These sides add variety to the dish, making it suitable for both casual dinners and special occasions.
Common Mistakes & How to Avoid Them
Even though this dish is straightforward, a few common mistakes can affect the final result. Here’s how to get it right every time:
1. Using Cold Broth or Water
Cold liquids slow the cooking process and can lead to unevenly cooked rice. Always use hot chicken broth and hot water to keep cooking times consistent.
2. Skipping the Pre-Bake Step
Baking the onion, garlic, and butter first may seem unnecessary, but it deepens the flavor of the dish. Skipping this step results in a less flavorful base.
3. Not Covering the Dish While Baking
Covering the dish with foil for the first 30 minutes is essential. It traps steam, ensuring that the rice cooks evenly and absorbs the flavors properly. Without this step, the rice may dry out or cook unevenly.
4. Using the Wrong Type of Rice
Not all rice works well for this method. The best options include:
- Long-grain white rice – The fluffiest texture.
- Basmati or jasmine rice – Adds subtle fragrance and cooks similarly.
Avoid using minute rice, risotto rice, or paella rice, as they do not absorb liquid properly in this cooking method.
5. Overcrowding the Chicken
Spacing the chicken evenly over the rice allows for proper heat distribution. If the pieces are packed too closely, the chicken may steam instead of developing a golden-brown exterior.
6. Overcooking or Undercooking the Rice
If the rice is still hard after baking, add a splash of hot water, cover the dish again, and bake for another 5-10 minutes. If it is too soft, slightly reduce the liquid next time or check that you are using the correct rice type.
7. Forgetting to Rest the Dish Before Serving
Resting the dish for 5 minutes after baking allows the remaining moisture to redistribute, ensuring fluffy rice and juicy chicken. Skipping this step may result in rice that is too wet or sticky.
How to Adjust the Recipe for Different Chicken Cuts
This recipe works best with bone-in, skinless chicken thighs, but if you prefer a different cut, follow these adjustments:
- Boneless, Skinless Chicken Thighs – Reduce cooking time slightly by baking the rice for 30 minutes first, then adding the chicken and baking uncovered for 20-25 minutes until done.
- Chicken Drumsticks – These work well with the original recipe. Keep the skin on for extra crispiness.
- Chicken Breasts – Since breasts cook faster, bake the rice for 30 minutes covered, then add the chicken and bake uncovered for 20-25 minutes. This prevents the chicken from drying out.
Ways to Customize the Recipe
This dish is highly adaptable, and you can modify it to suit different flavor preferences.
- Add Vegetables: Chopped bell peppers, peas, or carrots can be mixed into the rice before baking for extra nutrition.
- Use Different Seasonings: Swap the thyme for oregano, rosemary, or a Cajun spice blend for a different flavor profile.
- Make It Spicy: Add red pepper flakes or a pinch of cayenne to the chicken rub for some heat.
- Enhance with Lemon: Squeeze fresh lemon juice over the dish before serving to add brightness.
Recipe Tips, Storage, and FAQs
This oven-baked chicken and rice is not only easy to prepare but also great for meal prep. Understanding the best ways to store and reheat leftovers ensures that every serving is just as delicious as the first. Below, you’ll find expert tips, storage instructions, and answers to frequently asked questions.
Expert Tips for the Best Results
- Use the Right Rice: Long-grain white rice works best for this recipe. If using basmati or jasmine, keep the same cooking time. Brown rice requires additional liquid and a longer cooking time. Avoid minute rice or short-grain varieties.
- Season Well: The chicken rub adds depth to the dish. Make sure to coat the chicken evenly for maximum flavor.
- Keep the Rice Moist: Always use hot broth and hot water to ensure even cooking. Covering the dish for the first 30 minutes helps steam the rice properly.
- Let It Rest: After baking, let the dish rest for at least 5 minutes before serving. This helps the rice absorb any remaining moisture and enhances the texture.
- Fluff the Rice Gently: After removing the chicken, use a fork to fluff the rice. This keeps it light and prevents clumping.
Storage and Reheating Instructions
How to Store Leftovers
- Refrigeration: Allow the dish to cool completely, then store it in an airtight container in the refrigerator for up to 4 days.
- Freezing: For longer storage, place cooled portions in freezer-safe containers or bags and freeze for up to 3 months.
Best Reheating Methods
1. Microwave (Best for Quick Reheating)
- Place a portion on a microwave-safe plate.
- Add a splash of chicken broth or water to keep the rice moist.
- Cover with a damp paper towel and heat in 1-minute intervals until warmed through.
2. Oven (Best for Maintaining Texture)
- Preheat the oven to 300°F (150°C).
- Place leftovers in an oven-safe dish and cover with foil.
- Bake for 15-20 minutes or until heated through.
3. Stovetop (Best for Small Portions)
- Place the rice and chicken in a pan over medium heat.
- Add a tablespoon of broth or water to prevent drying out.
- Stir occasionally and cook until heated through.
Avoid reheating chicken multiple times to maintain the best texture and flavor.
Frequently Asked Questions (FAQs)
1. Can I Use a Different Cut of Chicken?
Yes. While bone-in, skinless chicken thighs work best, you can use:
- Chicken drumsticks – No changes needed.
- Boneless, skinless thighs – Bake the rice for 30 minutes first, then add the chicken and bake uncovered for 20-25 minutes until fully cooked.
- Chicken breasts – Since they cook faster, follow the same method as boneless thighs to prevent drying out.
2. Why Is My Rice Still Hard After Baking?
If the rice is undercooked, it may not have absorbed enough liquid. To fix this:
- Add a splash of hot water (¼ cup at a time).
- Cover the dish with foil and bake for another 5-10 minutes.
3. Can I Make This Recipe with Brown Rice?
Yes, but it requires adjustments:
- Add ½ cup extra hot water (totaling 1 ¾ cups of broth and 1 ½ cups of water).
- Bake covered for 1 hour, then uncover and bake for 15 minutes until fully cooked.
4. Can I Add Vegetables?
Yes. Chopped bell peppers, peas, carrots, or mushrooms can be added to the rice before baking. Keep in mind that some vegetables release moisture, so avoid overloading the dish.
5. How Do I Make the Chicken More Golden?
For a crispier, more golden finish:
- Lightly spray the chicken with oil before baking uncovered.
- Use the broil function for 2-3 minutes at the end of baking, watching carefully to prevent burning.
6. Can I Make This in Advance?
Yes. Assemble the dish ahead of time, cover it tightly, and refrigerate for up to 12 hours before baking. Let it sit at room temperature for 20 minutes before placing it in the oven.
Conclusion
This oven-baked chicken and rice is a simple yet flavorful dish that delivers perfectly cooked chicken and fluffy, garlicky rice in one pan. With the right techniques, proper storage, and a few simple adjustments, this recipe can be customized to fit any preference. Whether you’re making it fresh for dinner or enjoying leftovers later, this dish remains delicious and satisfying.
Try it out, experiment with variations, and enjoy a meal that’s both easy and full of rich, comforting flavors.
Asian Tuna Steak
Ingredients
- 2 tuna steaks
- 2 tablespoons olive oil
- 1 teaspoon sesame oil
- 1 teaspoon ground ginger
- 1 tablespoon soy sauce
- 1 teaspoon garlic powder
- 1 tablespoon rice vinegar
- 2 tablespoons sesame seeds divided
- Green onion sliced (for garnish)
Instructions
Prepare the Marinade
- In a small bowl, whisk together the olive oil, sesame oil, ground ginger, soy sauce, garlic powder, rice vinegar, and half of the sesame seeds.
Marinate the Tuna
- Pour half of the marinade over the tuna steaks, reserving the other half for later.
- Cover and refrigerate for at least 20 minutes (or up to overnight) while the grill heats.
Preheat the Grill
- Heat the grill to medium-high (350°F).
Coat the Tuna
- Remove the tuna steaks from the marinade and discard the excess.
- Coat the steaks with 1 tablespoon of sesame seeds (or more if needed) to create a crust.
Grill the Tuna
- Place the tuna steaks on the hot grill and cook for 2-3 minutes per side.
- Drizzle a bit of the reserved sauce over the steaks while grilling.
- For medium-rare, cook until the internal temperature reaches 135°F. The FDA recommends cooking tuna to 145°F for well-done.
Serve & Enjoy
- Remove from the grill and top with the remaining sauce, green onions, and additional sesame seeds.
- Serve immediately.


Leave a Comment