Oreo Cheesecake Cookie Cups are a delicious fusion of two beloved desserts—cookies and cheesecake. Each treat features a rich, chocolate cookie base shaped into a cup and filled with a light, creamy Oreo cheesecake filling. These handheld desserts are indulgent, easy to make, and ideal for parties, birthdays, potlucks, or satisfying your sweet tooth on a casual evening.
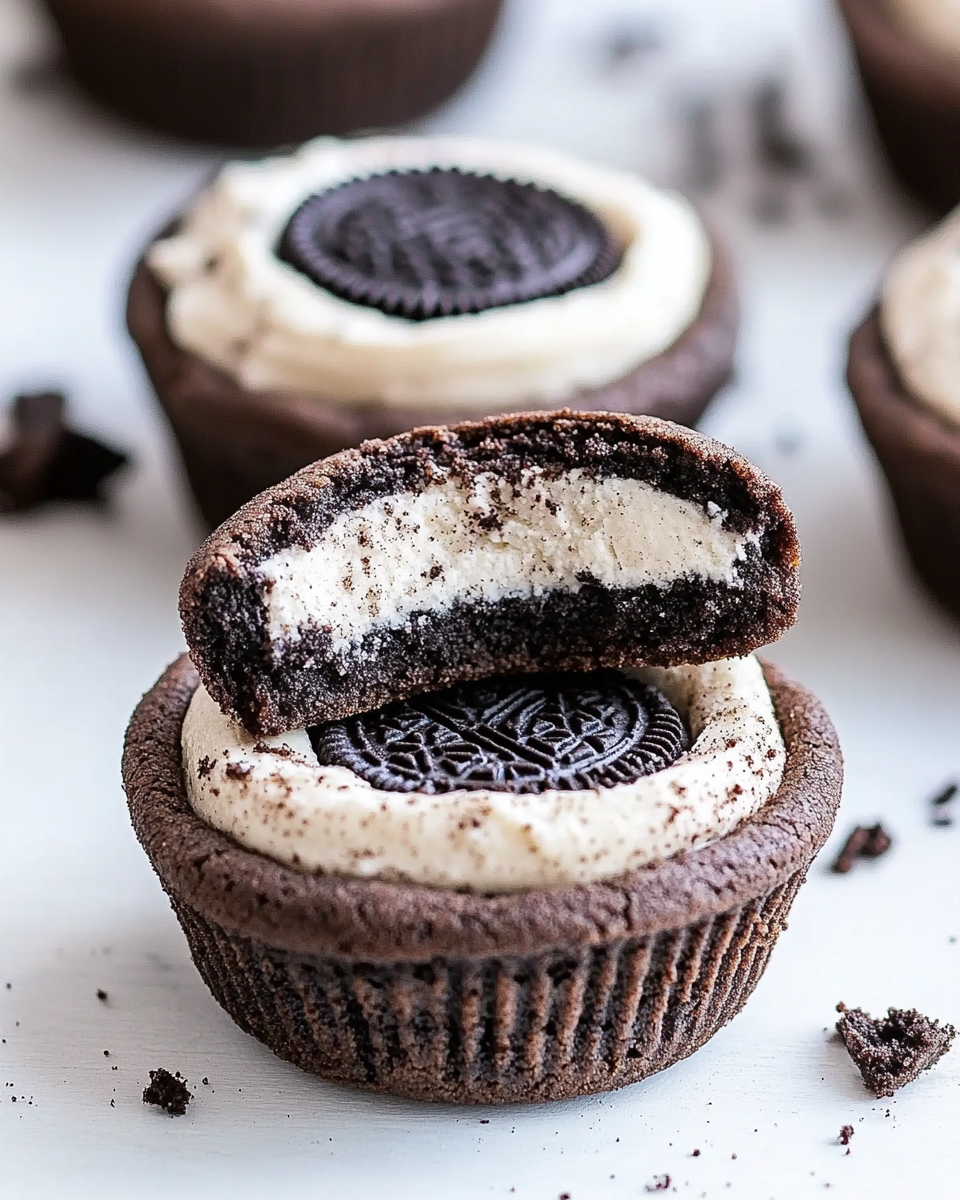
The cookie cups are baked in a standard muffin tin, creating a sturdy base with soft centers. The use of both Dutch-processed and black cocoa powder gives the cookie layer an intense chocolate flavor and a deep, Oreo-like color. Once baked and shaped, each cookie cup is filled with a whipped Oreo cheesecake filling made from cream cheese, sugar, and Oreo cookie crumbs folded into whipped cream.
Why You’ll Love This Recipe
There are several reasons to make Oreo Cheesecake Cookie Cups your next go-to dessert:
- Combines the flavor of Oreo cookies with the texture of cheesecake
- Perfectly portioned and easy to serve
- Requires only standard kitchen tools and equipment
- Great for make-ahead and freezer-friendly desserts
- Customizable with toppings like whipped cream or chocolate drizzle
Essential Tools and Equipment
To make this recipe successfully, you’ll need:
- Standard Muffin Tin – to shape the cookie cups evenly
- Stand Mixer or Hand Mixer – to cream the butter and whip the filling
- Mixing Bowls – for separating dry and wet ingredients
- Spatula – for folding the whipped cream into the cheesecake mixture
- Small Jar or Spoon – to press the cookie centers and form wells
- Wire Rack – to cool the cookie cups properly
- Piping Bag – for neatly filling the cookie cups with cheesecake
Preparation Tips
- Room temperature ingredients: Let the butter and eggs sit out for even blending.
- Sift cocoa powders: Helps prevent lumps and ensures a smooth dough.
- Chill your mixing tools: When whipping cream, use a cold bowl and beaters.
- Make fine Oreo crumbs: Remove the filling and pulse the cookies in a food processor.
Ingredients
For the Chocolate Cookie Cups:
- 2 cups all-purpose flour
- ¼ cup Dutch-processed cocoa powder, sifted
- ¼ cup black cocoa powder, sifted
- 1 teaspoon baking soda
- ½ teaspoon salt
- 1 cup unsalted butter, at room temperature
- ½ cup granulated sugar
- 1 cup light brown sugar, packed
- 2 large eggs, at room temperature
- 1 teaspoon vanilla extract
For the Oreo Cheesecake Filling:
- 1 cup heavy whipping cream, chilled
- 8 oz full-fat cream cheese, softened
- ½ cup granulated sugar
- ¾ cup Oreo cookie crumbs (filling removed)
Step-by-Step Instructions
Make the Cookie Cups
- Preheat your oven to 350°F (175°C). Grease two standard muffin tins.
- Combine dry ingredients: In a medium bowl, whisk flour, both cocoa powders, baking soda, and salt.
- Cream butter and sugars: In a stand mixer, beat butter, granulated sugar, and brown sugar until light and fluffy, about 2–3 minutes.
- Add eggs and vanilla: Beat in the eggs one at a time, followed by vanilla extract.
- Mix dry into wet: Add the dry ingredients gradually and mix until just combined.
- Portion dough: Use a large cookie scoop (3 tablespoons) to add dough to each muffin cup. Press to flatten slightly.
- Bake for 10–13 minutes, until the edges are set but the centers are still soft.
- Form wells: Immediately after baking, press down the center of each cookie with a small jar or spoon.
- Cool in the muffin tin for 10 minutes, then gently twist to loosen. Transfer to a wire rack to cool completely.
Make the Cheesecake Filling
- Whip the cream: In a chilled bowl, whip heavy cream to stiff peaks. Set aside.
- Mix cream cheese and sugar: In another bowl, beat until smooth.
- Add Oreo crumbs: Stir in the crumbs until fully combined.
- Fold in whipped cream: Gently fold or beat in the whipped cream until light and fluffy.
- Pipe the filling into the cooled cookie cups.
- Chill for 1–2 hours before serving. Optionally, garnish with more Oreo crumbs.
Serving Suggestions
Oreo Cheesecake Cookie Cups are as versatile as they are indulgent. Their handheld size and rich flavor make them perfect for a variety of occasions. Whether you’re serving a crowd or preparing a small dessert tray for a family dinner, these cookie cups adapt effortlessly to any setting.
Here are some ideas on how to serve them:
- Chilled: Always serve these straight from the refrigerator. The cheesecake filling sets best when cold, offering a firmer texture and more concentrated flavor.
- Decorated with toppings: Add a dollop of whipped cream, mini Oreo cookies, or a drizzle of melted chocolate for visual appeal and extra indulgence.
- Paired with hot or cold beverages: These cookie cups go exceptionally well with espresso, cappuccino, cold brew coffee, or even a glass of milk.
- Plated as part of a dessert board: Combine them with other bite-sized desserts like brownie bites, fruit tarts, or chocolate-covered strawberries for an elegant presentation.
These dessert cups are also a great option for bake sales, birthday buffets, or any gathering where finger foods shine. Because they’re individually portioned, guests can grab one without needing a knife or plate.
Common Mistakes to Avoid
Even though Oreo Cheesecake Cookie Cups are relatively simple to make, a few missteps can impact the final result. Here are the most common mistakes—and how to prevent them.
Overbaking the Cookie Cups
The cookie shells should be just set around the edges and slightly soft in the center when you take them out of the oven. They will continue to cook slightly as they cool in the muffin tin. Overbaking can result in a hard crust that’s difficult to bite through.
Solution: Bake for 10–13 minutes, and remove from the oven when the centers are still soft.
Not Pressing the Wells Deep Enough
After baking, pressing the centers with a small jar or spoon creates space for the cheesecake filling. If the wells are too shallow, the filling won’t sit properly and may spill over.
Solution: Press firmly while the cookie is still hot and soft to get a well-defined cavity.
Skipping the Chill Time
The cheesecake filling needs time to set. Skipping the refrigeration step leads to a runny or unstable texture.
Solution: Chill the filled cookie cups for at least 1 to 2 hours before serving.
Using Low-Fat Ingredients
Cream cheese and whipped cream provide structure to the filling. Using low-fat or reduced-fat versions may result in a thinner consistency and less flavor.
Solution: Use full-fat cream cheese and heavy whipping cream for best results.
Best Side Dishes and Pairings
Pairing your Oreo Cheesecake Cookie Cups with the right accompaniments can elevate the dessert experience. Here are eight complementary side ideas:
- Fresh Fruit Skewers: Strawberries, raspberries, and blueberries add a burst of freshness that balances the rich chocolate flavor.
- Vanilla Ice Cream: A small scoop served alongside contrasts the texture and enhances the dessert’s creaminess.
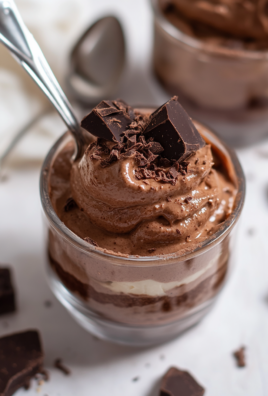
- Chocolate Mousse: For a decadent dessert board, offer mousse in shot glasses next to the cookie cups.
- Caramel Popcorn: Sweet and salty, this adds a crunchy contrast and complements the smooth cheesecake filling.
- Espresso or Coffee: The bitterness of strong coffee offsets the sweetness of the Oreo cups.
- Milkshakes: A classic cookies-and-cream milkshake makes for a playful pairing.
- Mini Brownies: Offering a second type of handheld chocolate dessert can create a dessert sampler.
- Whipped Cream with Crushed Oreos: Serve in a ramekin for dipping or topping each cup.
Presentation Tips
To enhance the presentation, consider the following:
- Serve on a white platter or wooden board for contrast.
- Use cupcake liners if transporting to a party or event.
- Garnish each cookie cup with half an Oreo or a light dusting of powdered sugar.
Oreo Cheesecake Cookie Cups are not only crowd-pleasers in terms of taste but also visually appealing when plated with care.
Storage and Reheating Instructions
Proper storage ensures your Oreo Cheesecake Cookie Cups remain fresh, flavorful, and ready to serve. Since these treats contain a cheesecake-based filling, refrigeration is essential.
Refrigeration
Store the filled cookie cups in an airtight container in the refrigerator for up to three days. For best results, keep them in a single layer to preserve the shape of the cheesecake filling. If stacking is necessary, place parchment paper between layers to prevent sticking.
Freezing
Oreo Cheesecake Cookie Cups freeze well, making them a great option for make-ahead desserts. To freeze:
- Place them on a baking sheet in a single layer.
- Freeze uncovered for 1–2 hours until firm.
- Transfer to a freezer-safe container or zip-top bag.
They can be stored frozen for up to four weeks. Thaw overnight in the refrigerator before serving. Avoid thawing at room temperature, as this can lead to condensation and soggy cookie shells.
Reheating
Reheating is not recommended for these cookie cups, as the cheesecake filling is best served cold. However, if the cookie base feels too firm straight from the fridge, allow the dessert to sit at room temperature for 5–10 minutes before serving.
Expert Tips for Perfect Results
- Use high-quality cocoa powders: Dutch-processed cocoa adds smooth richness, while black cocoa gives the signature Oreo taste and color.
- Avoid overmixing the dough: Once you add the dry ingredients, mix only until combined to maintain a tender texture.
- Whip the cream to stiff peaks: This step helps create a stable, fluffy cheesecake filling that holds its shape when piped.
- Chill everything thoroughly: Chill the mixing bowl for the whipped cream and refrigerate the finished cups before serving.
- Make ahead: Prepare the cookie cups a day in advance and store them unfilled. Fill them with cheesecake the day of serving for the best texture.
Frequently Asked Questions
Can I make Oreo Cheesecake Cookie Cups in advance?
Yes. You can bake the cookie cups up to two days in advance and store them at room temperature in an airtight container. The cheesecake filling can be made a day ahead and refrigerated separately. Assemble them a few hours before serving for optimal texture.
What can I use instead of black cocoa powder?
If black cocoa powder is unavailable, you can use all Dutch-processed cocoa instead. The flavor and appearance will be slightly different but still delicious.
How do I keep the filling from being runny?
Make sure your whipped cream reaches stiff peaks before folding it into the cream cheese mixture. Also, use full-fat cream cheese and allow the filled cups to chill thoroughly to set the filling.
Can I make this gluten-free?
Yes. Use a 1:1 gluten-free baking flour and gluten-free chocolate sandwich cookies to make the entire recipe gluten-free. Check that your baking soda and vanilla extract are also certified gluten-free if needed.
Can I make these without a piping bag?
Absolutely. You can use a spoon to fill the cookie cups if you don’t have a piping bag. However, piping gives a cleaner and more professional look.
Conclusion
Oreo Cheesecake Cookie Cups offer the perfect balance of rich chocolate and smooth, creamy cheesecake in a bite-sized format. With their deep cocoa flavor, Oreo-studded filling, and elegant presentation, these mini desserts are a favorite for any occasion. Whether you’re hosting a party, preparing a dessert board, or simply craving something indulgent, this recipe delivers flavor and convenience in one irresistible package.
These cookie cups are also highly adaptable. You can change the filling flavor, add toppings, or adjust the crust for different themes or seasons. Their simplicity and versatility make them an excellent addition to any baker’s collection.
If you enjoyed making Oreo Cheesecake Cookie Cups, you may also like our other mini dessert recipes, such as mini chocolate tarts, cheesecake bites, or stuffed cookie bars. Visit our desserts section for more inspiration and step-by-step guides.
Oreo Cheesecake Cookie Cups
Ingredients
Chocolate Cookie Cups:
- 2 cups all-purpose flour
- ¼ cup Dutch-processed cocoa powder sifted
- ¼ cup black cocoa powder sifted*
- 1 teaspoon baking soda
- ½ teaspoon salt
- 1 cup unsalted butter room temperature
- ½ cup granulated sugar
- 1 cup light brown sugar packed
- 2 large eggs room temperature
- 1 teaspoon vanilla extract
- Oreo Cheesecake Filling:
- 1 cup heavy whipping cream chilled
- 8 oz full-fat cream cheese softened
- ½ cup granulated sugar
- ¾ cup Oreo cookie crumbs**
Instructions
- Preheat oven to 350°F (175°C). Spray two standard muffin tins with nonstick spray.
- In a medium bowl, whisk together flour, Dutch cocoa, black cocoa, baking soda, and salt. Set aside.
- In the bowl of a stand mixer, beat butter, granulated sugar, and brown sugar on medium-high speed until light and fluffy (about 2–3 minutes).
- Reduce speed and add eggs one at a time, mixing after each addition. Add vanilla extract and mix to combine.
- Add the dry ingredients to the wet mixture and mix until just combined.
- Using a large cookie scoop (about 3 tablespoons), scoop dough into prepared muffin tins and press to flatten into the cups.
- Bake for 10–13 minutes, until the edges are set but the centers remain soft.
- Remove from the oven and immediately press down the centers of each cookie with a small jar or spoon to form wells.
- Cool in the pan for 10 minutes, gently twist to loosen, then cool another 5 minutes before transferring to a wire rack. Let cool completely.
- Make the Cheesecake Filling: 10. In a chilled bowl, whip the cold heavy cream to stiff peaks. Set aside. 11. In another bowl, beat cream cheese and sugar until smooth. Mix in Oreo crumbs. 12. Fold or gently beat in the whipped cream until the mixture is light and fluffy. 13. Pipe the cheesecake filling into the cooled cookie cups and refrigerate for 1–2 hours until set. 14. Sprinkle with additional Oreo crumbs before serving, if desired.

Leave a Comment