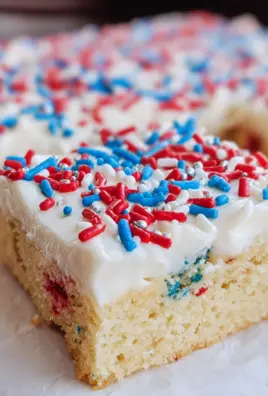
These no-bake Mini Biscoff Cheesecakes are a dream come true for cookie butter lovers. With a crunchy Biscoff cookie crust, a rich and creamy Biscoff-infused cheesecake filling, and a drizzle of melted cookie butter, they are an irresistible bite-sized dessert. Perfect for parties, special occasions, or simply indulging in a sweet treat, these cheesecakes are easy to prepare and require no baking.

Why You’ll Love This Recipe
- No-bake and simple to make
- Rich, creamy texture with the perfect balance of crunch
- Packed with deep caramelized Biscoff flavor
- Ideal for entertaining and make-ahead preparation
- Beautiful presentation with minimal effort
Preparation Phase & Tools to Use
Essential Tools and Equipment
- Mini cheesecake pan or muffin tin with cupcake liners for easy portioning and removal
- Mixing bowls for combining ingredients efficiently
- Electric mixer to achieve a smooth, lump-free cheesecake filling
- Piping bags and tips for clean and professional-looking assembly
- Spatula to scrape every bit of cheesecake mixture from the bowl
Preparation Tips
- Use room-temperature cream cheese for a smooth filling
- Refrigerate for at least 12 hours to allow the cheesecakes to fully set
- Crush Biscoff cookies finely for a stable and compact crust
- Use a mini cheesecake pan for easy unmolding, or line a muffin tin with cupcake liners for simple removal
Ingredients
Biscoff Cookie Crust
- 2 cups Biscoff cookie crumbs
- 2 tablespoons granulated sugar
- 6 tablespoons salted butter, melted
Biscoff Cheesecake Filling
- 16 oz cream cheese, room temperature
- 1 ¾ cups powdered sugar
- 1 cup Biscoff spread (cookie butter)
- 2 teaspoons vanilla extract
- 1 cup heavy cream
Whipped Cream
- ¾ cup heavy cream
- 2 tablespoons powdered sugar
- ½ teaspoon vanilla extract
Additional Toppings
- ¾ cup Biscoff spread, melted
- 2 tablespoons Biscoff cookie crumbs
- 12 Biscoff cookies, halved
Step-by-Step Directions
Make the Biscoff Cookie Crust
- In a mixing bowl, combine Biscoff cookie crumbs, granulated sugar, and melted butter.
- Mix until the crumbs are evenly coated with butter.
- Portion one tablespoon of the mixture into each cup of a mini cheesecake pan or lined muffin tin.
- Firmly press down to create a compact crust. Set aside.
Prepare the Cheesecake Filling
- In a large mixing bowl, beat together cream cheese, powdered sugar, Biscoff spread, and vanilla extract using an electric mixer. Mix until smooth and creamy.
- Slowly pour in the heavy cream while mixing on medium-high speed.
- Continue whipping until the mixture thickens and becomes light and fluffy.
Assemble and Chill
- Transfer the cheesecake mixture into a piping bag.
- Pipe the filling evenly over each prepared crust, slightly above the rim of the pan.
- Smooth the tops with a spatula if needed.
- Refrigerate for at least 12 hours or overnight to fully set.
- Once chilled, carefully remove the cheesecakes from the pan.
Make the Whipped Cream
- In a separate bowl, combine heavy cream, powdered sugar, and vanilla extract.
- Whip using an electric mixer until medium-stiff peaks form.
- Transfer to a piping bag fitted with a Wilton 1M tip.
Decorate and Serve
- Melt the Biscoff spread in the microwave for 30 seconds, then drizzle over the cheesecakes.
- Pipe a small swirl of whipped cream on top of each cheesecake.
- Sprinkle with Biscoff cookie crumbs for extra crunch.
- Garnish each mini cheesecake with half a Biscoff cookie before serving.
Serving Suggestions
Mini Biscoff Cheesecakes are rich, creamy, and full of caramelized cookie butter flavor. While they are delicious on their own, pairing them with complementary flavors and textures can elevate the dessert experience.
- Coffee or Espresso: The slight bitterness of coffee balances the sweetness of the cheesecakes. Serve with a hot cup of espresso, cappuccino, or a Biscoff latte.
- Fresh Berries: A side of fresh raspberries, strawberries, or blueberries adds a refreshing tartness that contrasts beautifully with the cheesecake’s richness.
- Dark Chocolate Drizzle: If you love a combination of flavors, drizzle melted dark chocolate over the cheesecakes before serving for a deep, slightly bitter contrast.
- Whipped Cream Swirl: While the recipe already includes a whipped cream topping, adding an extra swirl at serving enhances the lightness of each bite.
- Caramel Sauce: For an indulgent touch, drizzle warm caramel sauce over the cheesecakes for extra sweetness.
- Chopped Nuts: Sprinkle chopped toasted pecans, almonds, or hazelnuts over the top for added texture.
These cheesecakes are best served chilled, straight from the refrigerator, to maintain their creamy consistency. If making them ahead, keep them covered in an airtight container until serving.
Common Mistakes to Avoid & How to Perfect the Recipe
Even though this is a no-bake recipe, there are a few common pitfalls that can affect the final result. Avoid these mistakes to ensure perfect cheesecakes every time.
Overmixing the Cheesecake Filling
Whipping the cream cheese mixture too much can introduce excess air, leading to a soft, unstable texture. Mix just until the filling is smooth and thick enough to hold its shape.
Not Using Room-Temperature Cream Cheese
Cold cream cheese results in a lumpy filling. Let it sit at room temperature for at least 30 minutes before mixing.
Skipping the Chill Time
For the best texture, the cheesecakes must be refrigerated for at least 12 hours. Skipping this step may result in a runny filling that won’t hold up when unmolded.
Pressing the Crust Too Lightly
A loosely packed crust may crumble when removing the cheesecakes from the pan. Use a spoon or the bottom of a glass to firmly press down the crust mixture for a compact base.
Using a Muffin Tin Without Liners
If not using a mini cheesecake pan, be sure to line the muffin tin with paper liners. This makes removal much easier and prevents the crust from breaking apart.
Melting the Biscoff Spread Incorrectly
If overheated, Biscoff spread can become too runny or burn. Melt it in short 10- to 15-second intervals in the microwave, stirring between each interval to ensure a smooth consistency.
By following these simple steps, you can avoid common mistakes and achieve a professional-quality dessert every time.
Side Dish Recommendations
Pairing Mini Biscoff Cheesecakes with the right side dishes can make your dessert table even more enjoyable. Here are eight complementary options:
- Espresso or Cappuccino: The strong, slightly bitter taste of coffee contrasts with the sweet, spiced flavor of Biscoff, making it an ideal pairing.
- Fruit Salad: A fresh fruit salad with citrus segments, berries, and mint lightens the richness of the cheesecake.
- Vanilla Ice Cream: A scoop of vanilla ice cream adds extra creaminess and a classic flavor pairing.
- Hot Chocolate: A warm, velvety cup of hot chocolate complements the deep caramel and spice notes of Biscoff.
- Salted Caramel Popcorn: The sweet and salty contrast enhances the dessert’s flavor while adding a delightful crunch.
- Chocolate-Covered Strawberries: A sophisticated pairing that blends fresh fruit with indulgent chocolate.
- Chai Tea Latte: The spiced flavors in chai tea enhance the warm, cinnamon notes in Biscoff spread.
- Shortbread Cookies: A buttery, crisp cookie on the side offers a different texture while keeping the flavors consistent.
Recipe Tips
To ensure your Mini Biscoff Cheesecakes turn out perfectly every time, keep these expert tips in mind:
- Use finely crushed Biscoff cookies for the crust. A finer crumb helps create a firm, stable base that won’t crumble when removed from the pan.
- Chill the cheesecakes for at least 12 hours. This allows the filling to fully set, ensuring a firm yet creamy texture.
- Whip the heavy cream separately for extra fluffiness. If you want an even lighter cheesecake texture, whip the heavy cream separately and fold it into the cream cheese mixture.
- For clean edges, use a hot knife to slice the cheesecakes. If serving as individual bites, a quick dip of the knife in warm water before slicing will create smooth, clean cuts.
- Adjust the sweetness to your preference. If you prefer a less sweet filling, reduce the powdered sugar slightly without compromising texture.
- Let the Biscoff spread cool slightly before drizzling. This helps it thicken slightly and prevents it from running off the cheesecakes too quickly.
Storage & Reheating Instructions
Refrigeration
- Store the cheesecakes in an airtight container in the refrigerator for up to 3 days.
- Keep them chilled until ready to serve to maintain their creamy consistency.
Freezing
- These cheesecakes can be frozen for up to 1 month.
- To freeze, place them in a single layer on a baking sheet and freeze until firm. Then, transfer them to an airtight container or wrap them individually in plastic wrap.
- Thaw overnight in the refrigerator before serving.
Reheating
- No reheating is needed for these no-bake cheesecakes. Serve them cold for the best taste and texture.
- If frozen, allow them to thaw fully in the refrigerator before adding toppings and serving.
FAQs
Can I make these ahead of time?
Yes, these cheesecakes are perfect for making in advance. Prepare them up to two days ahead, store them in the refrigerator, and add the toppings just before serving.
Can I use a different cookie for the crust?
Absolutely. While Biscoff cookies provide the signature flavor, you can substitute graham crackers, Oreos, or digestive biscuits for a different taste.
What can I use instead of Biscoff spread?
If you don’t have Biscoff spread, you can try speculoos spread, peanut butter, or almond butter, though the flavor will be different.
How do I remove the cheesecakes cleanly from the pan?
If using a mini cheesecake pan, press gently from the bottom to pop them out. If using a muffin tin, use cupcake liners for easy removal.
Can I use Cool Whip instead of whipped cream?
Yes, you can substitute an equal amount of Cool Whip for the heavy cream in the filling if desired. However, homemade whipped cream gives a fresher taste.
How do I prevent the cheesecakes from becoming too soft?
Ensure that you chill them for the full 12 hours and avoid overmixing the filling, which can cause it to lose stability.
Conclusion
Mini Biscoff Cheesecakes are the ultimate no-bake treat, combining the irresistible flavor of cookie butter with a smooth, creamy filling and a crunchy cookie crust. Whether you’re making them for a party, holiday gathering, or just a personal indulgence, they are easy to prepare and guaranteed to impress.
With their perfect balance of sweetness and spice, these cheesecakes are best enjoyed cold, topped with a drizzle of melted Biscoff spread, a swirl of whipped cream, and a cookie garnish. By following the recipe tips, storage instructions, and serving suggestions, you can enjoy these bite-sized delights at their best.
Make them ahead, let them chill overnight, and savor every bite of this indulgent dessert.
O

Mini Biscoff Cheesecakes
Ingredients
Biscoff Cookie Crust:
- 2 cups Biscoff cookie crumbs
- 2 tablespoons granulated sugar
- 6 tablespoons salted butter melted
Biscoff Cheesecake Filling:
- 16 oz cream cheese room temperature
- 1 ¾ cups powdered sugar
- 1 cup Biscoff spread cookie butter
- 2 teaspoons vanilla extract
- 1 cup heavy cream
Whipped Cream:
- ¾ cup heavy cream
- 2 tablespoons powdered sugar
- ½ teaspoon vanilla extract
Additional Toppings:
- ¾ cup Biscoff spread cookie butter, melted
- 2 tablespoons Biscoff cookie crumbs
- 12 Biscoff cookies halved
Instructions
Make the Biscoff Cookie Crust
- In a mixing bowl, combine the Biscoff cookie crumbs, granulated sugar, and melted butter.
- Portion about 1 tablespoon of the mixture into each cup of a mini cheesecake pan.
- Firmly press down to form the crust. Set aside.
Prepare the Cheesecake Filling
- In a large bowl, use an electric mixer to beat the cream cheese, powdered sugar, Biscoff spread, and vanilla extract until smooth.
- Pour in the heavy cream and whip on medium-high speed until the mixture thickens and becomes light and fluffy.
Assemble and Chill
- Transfer the cheesecake mixture to a piping bag and pipe it onto the prepared crusts, slightly above the top of the pan.
- Refrigerate for at least 12 hours or overnight until fully set.
- Once chilled, carefully remove the cheesecakes from the pan.
Make the Whipped Cream
- In a bowl, whip the heavy cream, powdered sugar, and vanilla extract until medium-stiff peaks form.
- Transfer to a piping bag fitted with a Wilton 1M piping tip.
Decorate and Serve
- Melt the Biscoff spread in the microwave for about 30 seconds, then drizzle over the cheesecakes.
- Pipe a small swirl of whipped cream on top.
- Sprinkle with Biscoff cookie crumbs and garnish each cheesecake with half of a Biscoff cookie.


Leave a Comment