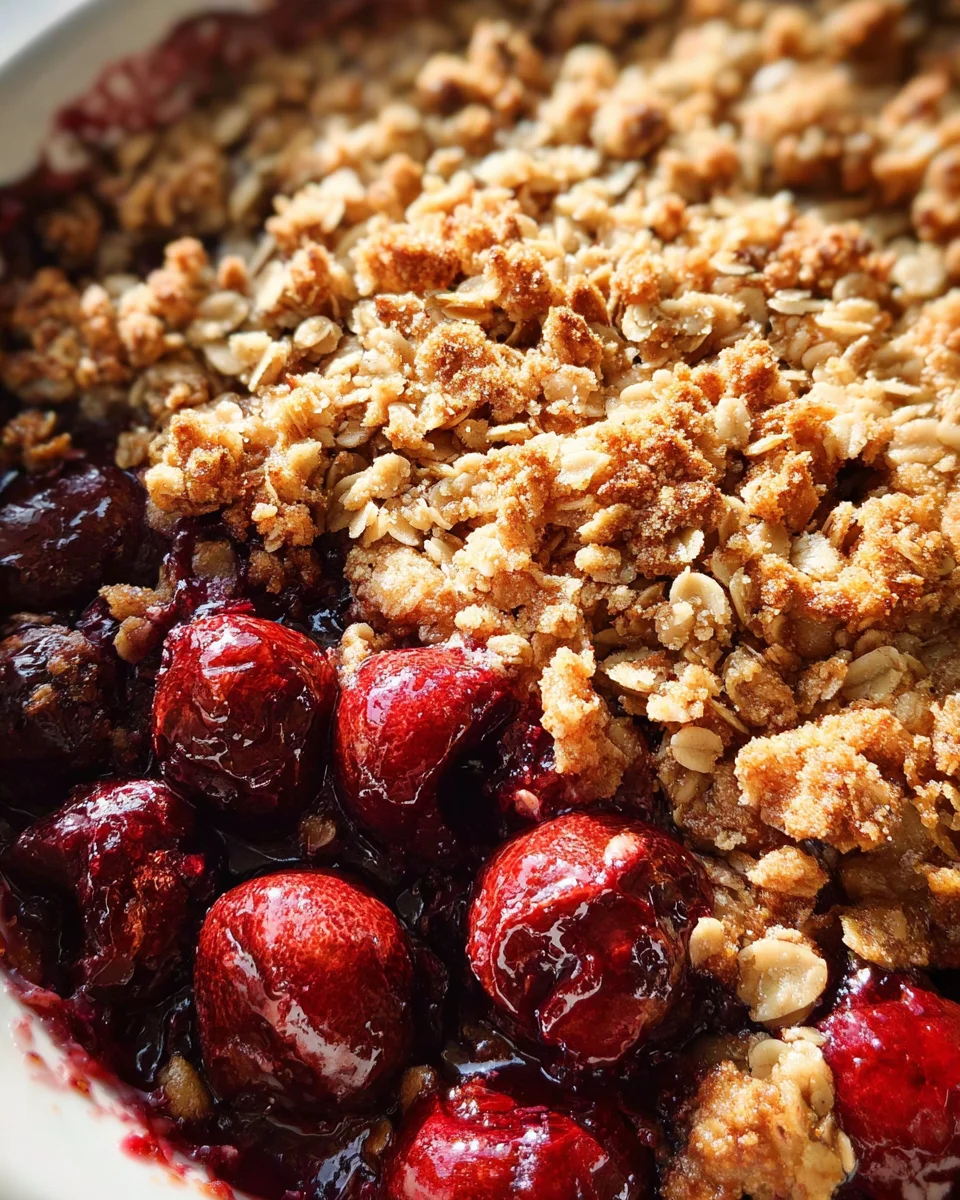
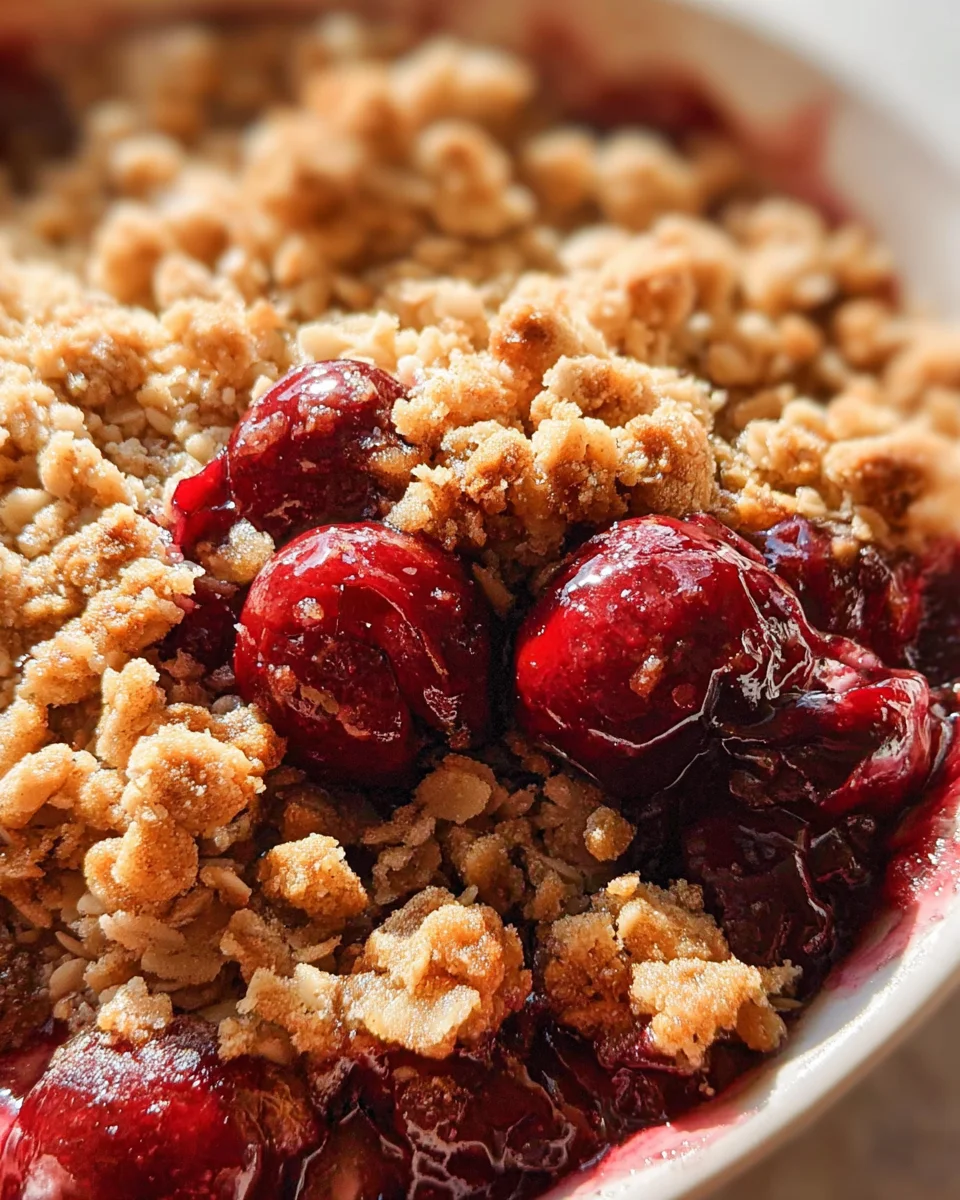
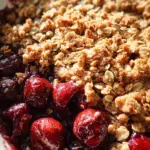
The cherry crisp recipe is the perfect blend of sweet and tart flavors, encased in a warm, crunchy topping. Ideal for family gatherings or a cozy night in, this dessert stands out with its simple preparation and delightful taste. Whether enjoyed on its own or paired with a scoop of vanilla ice cream, this cherry crisp will impress at any occasion.
Why You’ll Love This Recipe
- Easy to Make: With just a few simple steps, you can whip up this delicious dessert in no time.
- Crowd-Pleaser: The combination of sweet cherries and crunchy oats appeals to all ages, making it perfect for gatherings.
- Versatile Serving Options: Serve it warm on its own or with ice cream for an indulgent treat.
- Seasonal Flavor: Enjoy the essence of summer with tart cherries that brighten up any table.
- Customizable Recipe: Feel free to switch up the fruit or add nuts for a personal touch!
Tools and Preparation
Before diving into the cherry crisp recipe, gather your tools and equipment. Having everything ready will make the cooking process smooth and enjoyable.
Essential Tools and Equipment
- Mixing bowls
- Measuring cups
- 2-quart or 11×7-inch baking dish
- Saucepan
- Spoon or spatula
Importance of Each Tool
- Mixing bowls: Essential for combining ingredients without mess.
- Measuring cups: Ensure accuracy in your measurements for consistent results.
- Baking dish: A sturdy dish helps cook the cherry crisp evenly.
Ingredients
The delightful contrast of juicy tart cherries and a crunchy oat topping creates an absolutely irresistible cherry crisp recipe. Serve it warm with your favorite vanilla ice cream!
For the Pastry
- 1/4 teaspoon salt
- 1/2 cup packed brown sugar
- 1 cup all-purpose flour
- 1/2 cup cold butter, cubed
For the Filling
- 1 cup sugar
- 1/4 cup cornstarch
- 1 cup cherry juice blend
- 4 cups pitted tart red cherries
For the Topping
- 1-1/2 cups quick-cooking rolled oats
- 1/2 cup packed brown sugar
- 1/4 cup all-purpose flour
- 5 tablespoons butter, melted
How to Make Cherry Crisp Recipe
Step 1: Preheat the Oven
Preheat your oven to 350°F (175°C). In a mixing bowl, combine salt, sugar, and flour. Cut in the cold butter until the mixture resembles coarse crumbs. Press this dough into a greased 2-quart or 11×7-inch baking dish. Bake for 15 minutes.
Step 2: Prepare the Cherry Filling
While your pastry bakes, combine sugar and cornstarch in a saucepan. Stir in the cherry juice blend. Cook over medium heat until thickened, stirring constantly. Fold in the pitted tart cherries and pour this filling over the baked crust.
Step 3: Make the Oat Topping
In a small bowl, mix together rolled oats, brown sugar, and flour for the topping. Cut in cold butter until it becomes crumbly. Sprinkle this mixture over the cherry filling evenly. Bake for another 20 to 25 minutes until golden brown and bubbly around the edges.
Enjoy your homemade cherry crisp recipe! It’s sure to be a hit!
How to Serve Cherry Crisp Recipe
Cherry crisp is a versatile dessert that can be enjoyed in various ways. Whether you’re hosting a dinner party or simply treating yourself, these serving suggestions will enhance your cherry crisp experience.
Classic Serving
- Vanilla Ice Cream: A scoop of creamy vanilla ice cream perfectly complements the warm cherry filling.
- Whipped Cream: Light and airy whipped cream adds a delightful texture and sweetness to each bite.
Creative Twists
- Greek Yogurt: For a healthier option, top your cherry crisp with Greek yogurt for added protein and creaminess.
- Almonds or Pecans: Sprinkle crushed nuts on top for extra crunch and a nutty flavor contrast.
Seasonal Touches
- Fresh Mint Leaves: Garnish your cherry crisp with mint leaves to add color and a refreshing taste.
- Coconut Flakes: Toasted coconut flakes can give your dessert a tropical flair.
How to Perfect Cherry Crisp Recipe
To create an unforgettable cherry crisp, follow these helpful tips for the best results.
- Use Fresh Cherries: Fresh tart cherries provide the best flavor and texture. If they’re out of season, opt for frozen cherries without added sugar.
- Chill the Butter: Keeping your butter cold ensures a flaky crust and topping. This technique helps create those delicious steam pockets during baking.
- Adjust Sweetness: Depending on your taste preferences, feel free to adjust the sugar in the filling. Tart cherries may need more sugar than sweet cherries.
- Don’t Overmix Topping: Mix just until crumbly to prevent your topping from becoming too dense. A light hand will yield the best results.
Best Side Dishes for Cherry Crisp Recipe
Pairing side dishes with your cherry crisp can elevate the entire meal. Here are some great options to consider:
- Grilled Chicken: Juicy grilled chicken offers a savory contrast to the sweet cherry crisp.
- Roasted Vegetables: Colorful roasted vegetables like zucchini and bell peppers provide balance and nutrition.
- Mixed Green Salad: A fresh salad with vinaigrette brings brightness and acidity that complements the dessert.
- Cheese Platter: A selection of cheeses can enhance flavors; try pairing with brie or aged cheddar for variety.
- Crusty Bread: Slices of warm, crusty bread are perfect for soaking up any leftover cherry juices on your plate.
- Fruit Salad: A light fruit salad can provide a refreshing taste alongside the rich flavors of cherry crisp.
- Ice Cream Sundae Bar: Make it interactive by offering toppings like chocolate syrup, sprinkles, and nuts for fun dessert customization.
- Coffee or Tea: Ending the meal with a hot beverage can help cleanse the palate after enjoying this sweet treat.
Common Mistakes to Avoid
Making the perfect cherry crisp can be tricky. Here are some common mistakes to avoid for the best results.
- Using warm butter: Warm butter in your pastry can lead to a soggy crust. Always use cold butter for a flaky texture.
- Not measuring ingredients accurately: Incorrect measurements can ruin the balance of flavors and textures. Use measuring cups and spoons for precision.
- Overcooking the filling: Cooking the cherry filling too long can break down the fruit and affect texture. Cook just until thickened, then combine with cherries.
- Skipping the resting time: Letting your cherry crisp cool slightly before serving helps it set. This step ensures cleaner slices and better flavor integration.
- Ignoring topping distribution: Unevenly spreading the topping can lead to some areas being dry while others are overly crunchy. Make sure to sprinkle it evenly over the filling.
Storage & Reheating Instructions
Refrigerator Storage
- Store leftover cherry crisp in an airtight container.
- It can last up to 3 days in the refrigerator.
Freezing Cherry Crisp Recipe
- Place cooled cherry crisp in a freezer-safe container or wrap tightly with plastic wrap.
- It will keep well for up to 3 months in the freezer.
Reheating Cherry Crisp Recipe
- Oven: Preheat to 350°F, cover with foil, and heat for about 15-20 minutes until warmed through.
- Microwave: Place individual servings on a microwave-safe plate and heat for 30-60 seconds, checking regularly.
- Stovetop: Heat on low in a skillet, stirring gently until warmed through.
Frequently Asked Questions
Here are some common questions about this delicious cherry crisp recipe.
Can I use frozen cherries in this Cherry Crisp Recipe?
Yes, you can use frozen cherries! Just let them thaw and drain excess liquid before using them in your recipe.
How do I make my Cherry Crisp Recipe gluten-free?
To make it gluten-free, substitute all-purpose flour with a gluten-free flour blend. Ensure your oats are certified gluten-free as well.
Can I add other fruits to my Cherry Crisp Recipe?
Absolutely! Mixing cherries with blueberries or raspberries can add different flavors and textures to your dish.
How do I know when my Cherry Crisp is done baking?
Your cherry crisp is done when the topping is golden brown, and you see bubbling around the edges.
Final Thoughts
The cherry crisp recipe is not only delightful but also incredibly versatile. You can customize it by adding different fruits or spices based on your taste preferences. Serve it warm with vanilla ice cream for an irresistible dessert that everyone will love!
Cherry Crisp Recipe
- Total Time: 55 minutes
- Yield: Serves 8
Description
Indulge in the delightful flavors of this Cherry Crisp Recipe, where sweet tart cherries meet a warm, crunchy oat topping. Perfect for any occasion, this dessert is easy to prepare and sure to impress family and friends. With its simple steps and customizable options, you can tailor each batch to your liking, whether by adding nuts or mixing in other fruits. Serve it warm with a scoop of vanilla ice cream for a satisfying treat that captures the essence of summer in every bite.
Ingredients
- 4 cups pitted tart red cherries
- 1 cup sugar
- 1/4 cup cornstarch
- 1/2 cup packed brown sugar (for both pastry and topping)
- 1 cup all-purpose flour (for both pastry and topping)
- 1–1/2 cups quick-cooking rolled oats
- 3/4 cup cold butter (cubed and melted)
- 1/4 teaspoon salt
Instructions
- Preheat your oven to 350°F (175°C). In a bowl, combine salt, brown sugar, and flour. Cut in cold butter until crumbly. Press into a greased baking dish and bake for 15 minutes.
- While baking, mix sugar and cornstarch in a saucepan. Stir in cherry juice blend; cook over medium heat until thickened. Fold in cherries and pour over baked crust.
- Combine oats, brown sugar, flour, and melted butter for topping. Mix until crumbly and sprinkle evenly over the cherry filling. Bake for an additional 20-25 minutes until golden brown.
- Prep Time: 15 minutes
- Cook Time: 40 minutes
- Category: Dessert
- Method: Baking
- Cuisine: American
Nutrition
- Serving Size: 1 slice (150g)
- Calories: 320
- Sugar: 24g
- Sodium: 150mg
- Fat: 15g
- Saturated Fat: 9g
- Unsaturated Fat: 5g
- Trans Fat: 0g
- Carbohydrates: 43g
- Fiber: 3g
- Protein: 3g
- Cholesterol: 30mg

Leave a Comment