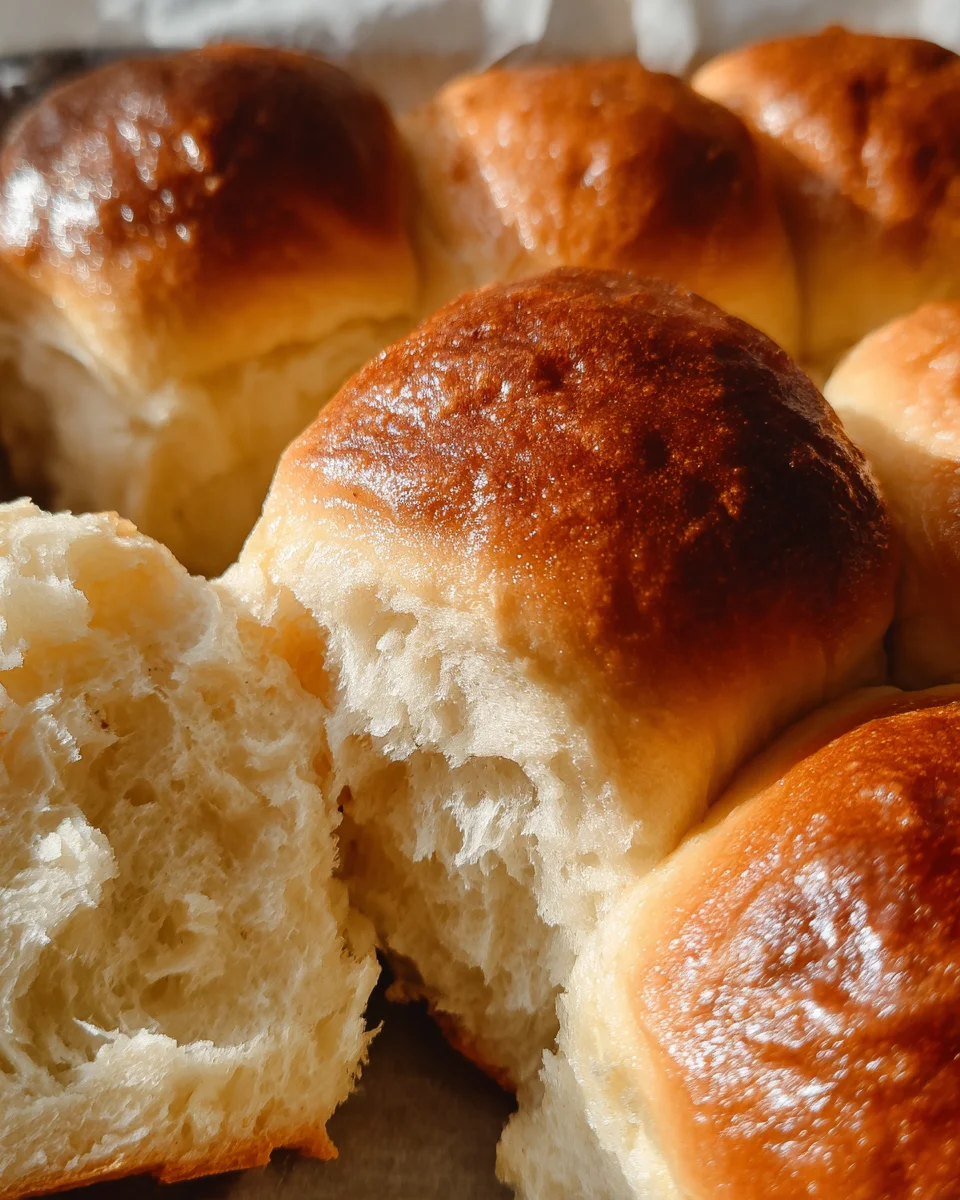
Buttermilk Rolls are a delightful treat that brings warmth and comfort to any meal. These soft, fluffy rolls are perfect for family dinners, holiday gatherings, or simply enjoying with your favorite soup. The unique touch of buttermilk makes them moist and flavorful, setting them apart from ordinary bread. Whether served fresh from the oven or toasted the next day, Buttermilk Rolls are sure to impress.
Why You’ll Love This Recipe
- Easy to Make: This recipe is straightforward, making it perfect for both beginners and seasoned bakers.
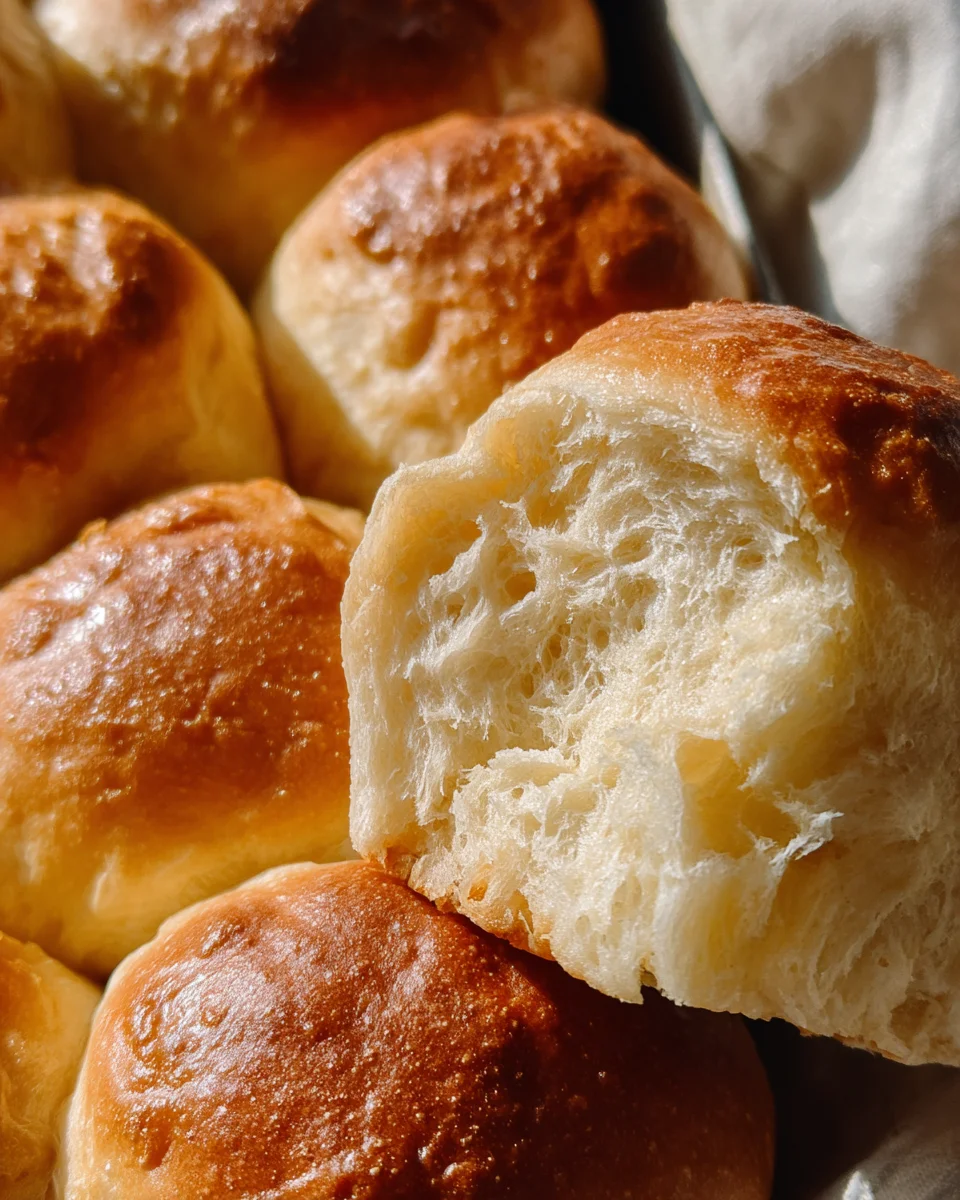
- Fluffy Texture: The combination of buttermilk and yeast results in rolls that are light and airy.
- Versatile Side Dish: These rolls pair wonderfully with soups, stews, and salads, enhancing every meal.
- Homemade Goodness: Baking from scratch not only fills your home with a wonderful aroma but also delivers fresh flavors.
- Family Favorite: With their delicious taste and soft texture, these rolls quickly become a staple in any household.
Tools and Preparation
Preparing Buttermilk Rolls requires some essential tools to ensure success. Having the right equipment on hand will make the baking process smoother and more enjoyable.
Essential Tools and Equipment
- Mixing bowl
- Whisk
- Measuring cups
- Measuring spoons
- 9-by-13-inch glass baking dish
- Plastic wrap
Importance of Each Tool
- Mixing bowl: A large mixing bowl allows you to combine ingredients easily without spills.
- Whisk: Using a whisk helps to incorporate air into your mixture, ensuring a light dough.
- 9-by-13-inch glass baking dish: This specific size is perfect for arranging your rolls evenly for optimal baking.
Ingredients
For the Dough
- 1 cup buttermilk
- 3 tablespoons unsalted butter, plus more for the baking dish
- 1 tablespoon sugar
- 1/4 teaspoon baking soda
- One .25-ounce package dry yeast
- 3 1/2 cups all-purpose flour
- 1 teaspoon salt
How to Make Buttermilk Rolls
Step 1: Combine Wet Ingredients
Heat the buttermilk, butter, and sugar in a pot until simmering. Whisk in the baking soda and let it cool to lukewarm. In a separate bowl, mix 1/4 cup lukewarm water with the yeast; let it stand for 5 minutes before whisking it into the buttermilk mixture.
Step 2: Mix Dry Ingredients
In a large bowl, whisk together the flour and salt. Pour in the buttermilk mixture and stir until a soft dough forms. Knead the dough in the bowl for about 2 minutes until it becomes smooth. Cover with plastic wrap and let it rest for 30 minutes.
Step 3: Shape the Rolls
Preheat your oven to 425 degrees F. Butter a 9-by-13-inch glass baking dish. Divide the dough into 12 equal pieces and roll each piece into a ball. Place these balls in the buttered dish, lightly cover with plastic wrap, and let them rise until nearly doubled in size (about 1 1/2 hours).
Step 4: Bake Your Rolls
Once risen, place the dish in your preheated oven. Bake until puffed up and golden brown—this should take around 15 minutes. Serve warm for an irresistible treat!
How to Serve Buttermilk Rolls
Buttermilk rolls are a versatile side dish that can elevate any meal. Their soft texture and rich flavor make them perfect for a variety of occasions.
With Soups and Stews
- Creamy Tomato Soup: These rolls pair wonderfully with rich, tomato-based soups, soaking up the flavors beautifully.
- Beef Stew: Enjoy buttermilk rolls alongside a hearty beef stew for a comforting dinner experience.
At Breakfast
- Scrambled Eggs: Serve warm buttermilk rolls with fluffy scrambled eggs for a delicious morning boost.
- Breakfast Sandwiches: Use the rolls as a base for breakfast sandwiches filled with eggs, cheese, and your choice of meat.
For Family Dinners
- Roast Chicken: Complement your roast chicken with these buttery rolls, enhancing the meal with their soft texture.
- Salads: Pair the rolls with fresh salads for a balanced and satisfying family dinner.
As Snacks
- With Butter and Jam: A simple yet delightful way to enjoy buttermilk rolls is to slather them in butter and your favorite jam.
- Cheese Board Addition: Include them on a cheese platter for an elegant touch at gatherings.
How to Perfect Buttermilk Rolls
To achieve the best results when making buttermilk rolls, consider these helpful tips.
- Temperature Control: Ensure that your buttermilk is lukewarm before mixing, as too hot can kill the yeast.
- Kneading Technique: Knead the dough just until smooth; overworking it can lead to tough rolls.
- Rising Time: Allow adequate time for the dough to rise; this helps create fluffy, airy rolls.
- Baking Watchfulness: Keep an eye on your rolls while they bake to prevent over-browning—every oven is different!
- Storage Tips: Store leftover rolls in an airtight container at room temperature to maintain softness.
Best Side Dishes for Buttermilk Rolls
Buttermilk rolls make an excellent accompaniment to various dishes. Here are some great side options to serve alongside them:
- Garlic Mashed Potatoes: Creamy mashed potatoes infused with garlic perfectly complement the soft texture of buttermilk rolls.
- Roasted Vegetables: A medley of seasonal vegetables roasted until tender adds color and nutrition to your meal.
- Caesar Salad: Crisp romaine lettuce topped with creamy dressing offers a refreshing crunch beside warm rolls.
- Baked Beans: Sweet and savory baked beans are a classic side that pairs well with the richness of buttermilk rolls.
- Grilled Corn on the Cob: Charred corn adds a delightful sweetness when served alongside freshly baked bread.
- Spinach Artichoke Dip: Warm cheesy dip provides a tasty contrast to the bread’s fluffy texture.
Common Mistakes to Avoid
Making Buttermilk Rolls can be a rewarding experience, but common mistakes can lead to disappointing results. Here are some errors to watch for.
- Using cold ingredients – Cold buttermilk or butter can prevent proper dough activation. Always ensure your ingredients are at room temperature before mixing.
- Not measuring flour correctly – Too much flour can make your rolls dense. Use the spoon-and-level method to accurately measure your flour.
- Skipping the resting time – Allowing the dough to rise is crucial for fluffy rolls. Don’t rush this process; give it ample time to double in size.
- Overbaking the rolls – Baking too long can dry them out. Keep an eye on the oven and remove them once they’re golden brown.
- Ignoring the yeast’s activity – If your yeast doesn’t bubble after 5 minutes, it may be inactive. Always check its freshness before starting.
Refrigerator Storage
- Buttermilk Rolls can be stored in the refrigerator for up to 3 days.
- Place them in an airtight container or wrap them tightly in plastic wrap.
Freezing Buttermilk Rolls
- You can freeze Buttermilk Rolls for up to 3 months.
- Allow the rolls to cool completely before wrapping in aluminum foil or freezer bags to prevent freezer burn.
Reheating Buttermilk Rolls
- Oven – Preheat the oven to 350°F (175°C) and warm the rolls for about 10-15 minutes for a fresh-baked taste.
- Microwave – Place a roll on a microwave-safe plate and cover with a damp paper towel. Heat for 10-15 seconds until warm.
- Stovetop – Steam the rolls over boiling water for a few minutes, keeping them soft and fluffy.
Frequently Asked Questions
What makes Buttermilk Rolls so soft?
The combination of buttermilk and kneading creates a tender texture that keeps these rolls soft and fluffy.
Can I use regular milk instead of buttermilk?
Yes, you can substitute regular milk by adding 1 tablespoon of vinegar or lemon juice per cup of milk to mimic buttermilk’s tanginess.
How do I know if my yeast is active?
If your yeast bubbles and froths after being mixed with warm water, it’s active. If not, you’ll need fresh yeast.
Can I make Buttermilk Rolls ahead of time?
Absolutely! Prepare the dough ahead of time, let it rise, then refrigerate or freeze before baking later on.
Final Thoughts
Buttermilk Rolls are a delightful addition to any meal, perfect as a side dish or snack. Their versatility allows for endless customization—try adding herbs, cheese, or spices to make them uniquely yours. Give this recipe a try; you won’t be disappointed!
Buttermilk Rolls
- Total Time: 35 minutes
- Yield: Makes approximately 12 rolls 1x
Description
Buttermilk Rolls are the ultimate comfort food, offering a soft and fluffy texture that elevates any meal. Baked to golden perfection, these rolls feature a unique tang from buttermilk, setting them apart from standard bread. Perfect for family dinners, holiday gatherings, or as a delightful accompaniment to soups and stews, Buttermilk Rolls are incredibly easy to make—ideal for both novice and experienced bakers. Enjoy them fresh from the oven or toasted the next day; either way, they promise to be a hit at your table.
Ingredients
- 1 cup buttermilk
- 3 tablespoons unsalted butter
- 1 tablespoon sugar
- 1/4 teaspoon baking soda
- 1 package (0.25-ounce) dry yeast
- 3 1/2 cups all-purpose flour
- 1 teaspoon salt
Instructions
- Combine buttermilk, butter, and sugar in a pot over low heat until simmering. Whisk in baking soda and let cool to lukewarm.
- In a separate bowl, mix yeast with 1/4 cup lukewarm water and let sit for five minutes. Add this mixture to the buttermilk blend.
- In a large bowl, whisk together flour and salt. Pour in the buttermilk mixture and stir until a soft dough forms.
- Knead briefly in the bowl until smooth; cover with plastic wrap and let rest for 30 minutes.
- Preheat oven to 425°F (220°C). Butter a 9-by-13-inch baking dish.
- Divide dough into twelve pieces, shape each into a ball, and place in the prepared dish. Cover lightly with plastic wrap and let rise until doubled (about 1.5 hours).
- Bake for about 15 minutes or until golden brown.
- Prep Time: 20 minutes
- Cook Time: 15 minutes
- Category: Side Dish
- Method: Baking
- Cuisine: American
Nutrition
- Serving Size: 1 roll (60g)
- Calories: 180
- Sugar: 2g
- Sodium: 210mg
- Fat: 6g
- Saturated Fat: 3g
- Unsaturated Fat: 2g
- Trans Fat: 0g
- Carbohydrates: 28g
- Fiber: 1g
- Protein: 4g
- Cholesterol: 10mg


Leave a Comment