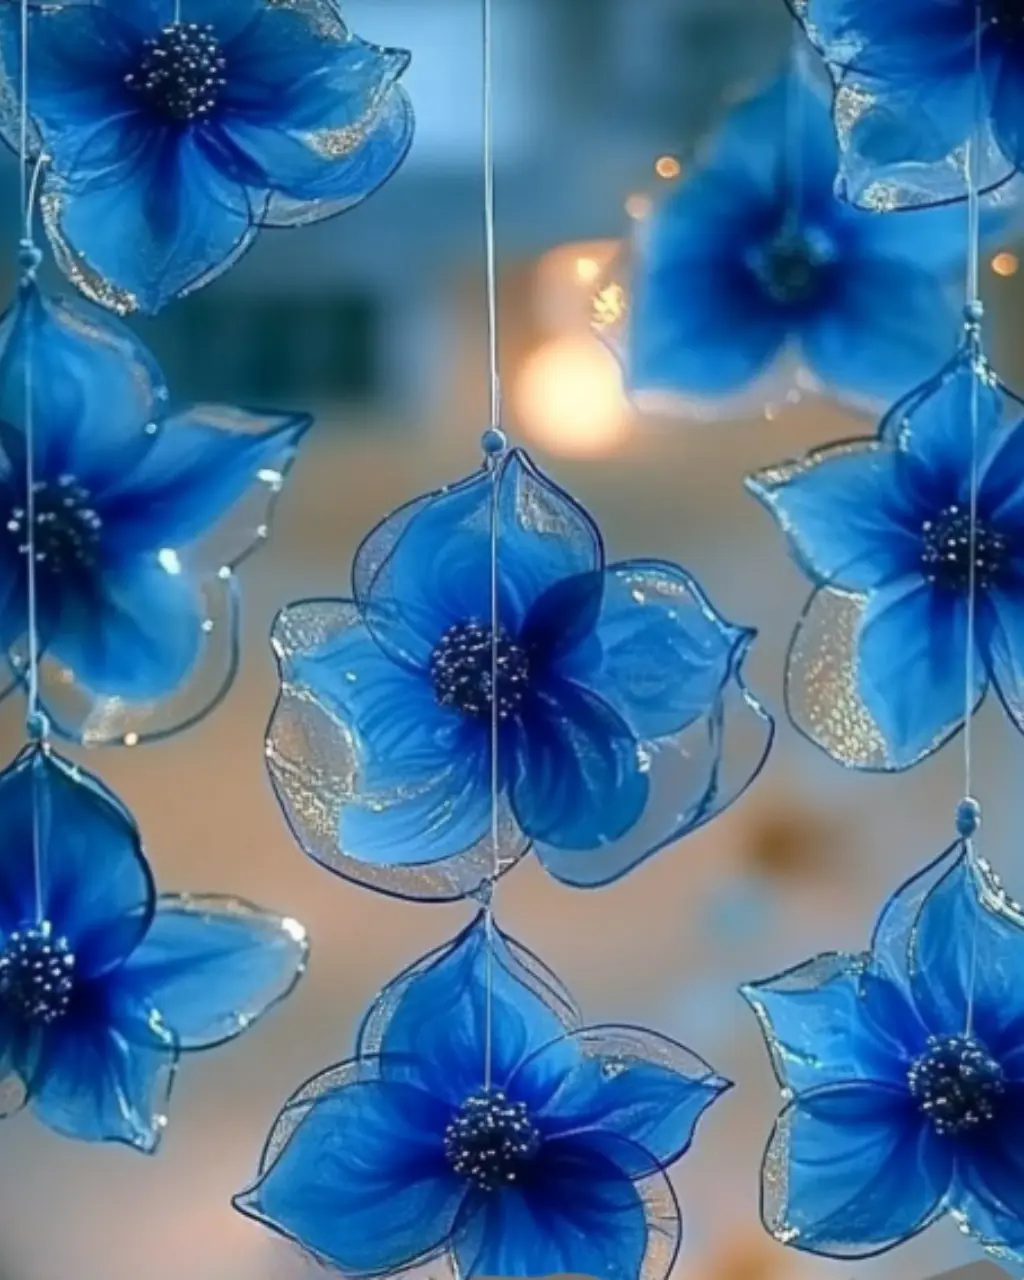
Step-by-Step Guide to Making Blue Crayon Suncatchers
A Bright and Fun DIY Craft for Kids and Adults Alike
Creating blue crayon suncatchers is a fun and rewarding craft that turns leftover crayons into glowing window decorations. This easy project is ideal for kids, classrooms, rainy days, or sunny afternoons. The calming shades of blue paired with light-filtering wax paper make each piece unique and beautiful.

These homemade suncatchers add a splash of color to any window and offer a perfect opportunity to explore art, color theory, and recycling with kids. The real beauty? Every suncatcher is a one-of-a-kind creation.
Why You’ll Love Making Blue Crayon Suncatchers
- 🔹 Easy and mess-free with adult supervision
- 🔹 Promotes color mixing and fine motor skills
- 🔹 Perfect for all seasons
- 🔹 Uses common household items
- 🔹 Customizable with different shades and shapes
What You’ll Need
| Item | Purpose |
|---|---|
| Blue crayons | Main coloring medium (use multiple shades) |
| Pencil or sharpener | To create crayon shavings |
| Wax paper | For layering and melting the crayons |
| Iron (no steam) | Adult tool for melting the crayon shavings |
| Scissors | For cutting suncatcher shapes |
| Hole punch | To create holes for hanging |
| String or embroidery floss | To hang the finished suncatchers |
Essential Tools and Equipment
🔧 Pencil or Crayon Sharpener
- Easily produces thin, even shavings for better melting.
🔧 Wax Paper
- Semi-transparent and heat-friendly—perfect for suncatchers.
🔧 Iron (Adult Use Only)
- Low heat setting melts the crayon shavings between the wax paper.
🔧 Scissors
- Use sharp scissors for cleaner shapes and better precision.
🔧 Hole Punch
- Creates clean, even holes for stringing and hanging.
🔧 String or Embroidery Floss
- Provides a strong, flexible method to hang your suncatchers.
Preparation Tips
Before starting your blue crayon suncatchers, follow these quick tips for best results:
- Peel crayons ahead of time to streamline the process
- Cover your workspace with newspaper or an old towel
- Test a small piece first to see how your iron reacts to wax
- Choose 2–3 shades of blue to create a marbled, layered look
- Pre-cut wax paper sheets to save time during the activity
Ingredients (Materials) List
Here’s everything you need, organized for clarity:
🖍️ Materials
- 3–4 blue crayons (light, medium, and dark blue)
- 1 pencil or crayon sharpener
- 2 sheets of wax paper
- 1 iron (adult use only)
- 1 pair of scissors
- 1 hole punch
- 1–2 feet of string or embroidery floss
How to Make Blue Crayon Suncatchers (Step-by-Step)
Step 1: Peel Your Crayons
- Remove all paper wrappers from your blue crayons.
- Break larger crayons into smaller pieces if needed.
Step 2: Make the Crayon Shavings
- Use a sharpener or knife (adults only) to create fine shavings.
- Distribute shavings evenly on one sheet of wax paper.
Step 3: Layer with Wax Paper
- Place another piece of wax paper on top, sandwiching the shavings inside.
- Press lightly to flatten the layers.
Step 4: Melt the Crayon Shavings
- Preheat your iron on low—no steam.
- With an adult’s help, press gently on the wax paper for a few seconds at a time.
- Check often until the crayon is fully melted but not runny.
Step 5: Let It Cool
- Remove the wax paper from the heat and allow it to cool completely (about 10 minutes).
- Once hardened, you’re ready to cut your shapes.
Step 6: Cut Your Shapes
- Use scissors to cut raindrops, hearts, stars, or any shape you like.
- For consistency, trace shapes with a pencil or use cookie cutters as stencils.
Step 7: Punch and Hang
- Punch a hole at the top of each shape.
- Thread a string or floss through and tie a knot.
- Hang your blue crayon suncatchers in a sunny window and enjoy the glow!
Tips & Creative Variations
- 🎨 Mix in white or turquoise for a soft, dreamy look.
- 🌈 Try different shapes like clouds, stars, or moons.
- 🔄 Layer multiple suncatchers at different lengths to create a mobile.
- ✂️ Use cookie cutters as tracing tools for clean shapes.
- 🖌️ Let kids draw on the wax paper with markers before melting for extra design.
Display Ideas, Mistakes to Avoid, and Side Activities for Blue Crayon Suncatchers
🎨 Creative Display Suggestions for Blue Crayon Suncatchers
Once your blue crayon suncatchers are finished, it’s time to show them off! Here are some fun and functional ways to display your homemade art:
- 🪟 Hang in sunny windows to catch the light and create glowing blue hues
- 🌳 Attach to tree branches for an outdoor mobile (in dry weather only)
- 🎁 Use as gift toppers for birthdays, holidays, or handmade presents
- 🧵 String together in a banner for party or classroom decorations
- 🌞 Decorate a porch or balcony with weatherproofed versions
- ✨ Add to lanterns or mason jars for luminary effects
- 🏫 Brighten up classrooms with seasonal displays
- 🎨 Frame in clear plastic or laminate for long-term art keepsakes
❌ Common Mistakes to Avoid
Crafting blue crayon suncatchers is simple, but a few missteps can ruin your final look. Here’s how to avoid them:
1. Using Too Many Crayon Shavings
- Why it’s a problem: Excess wax causes uneven melting and clumps
- How to fix it: Use a light, even layer of shavings
2. Ironing Too Long
- Why it’s a problem: Overheating can burn the wax or warp the paper
- How to fix it: Use a low heat setting and apply pressure briefly, checking often
3. Not Letting the Wax Cool
- Why it’s a problem: Cutting warm wax can cause tears or smudging
- How to fix it: Wait at least 10 minutes for the wax to harden fully
4. Skipping Adult Supervision During Ironing
- Why it’s a problem: The iron is hot and can be dangerous for kids
- How to fix it: Always ensure an adult performs the melting step
5. Using the Wrong Type of Paper
- Why it’s a problem: Parchment or baking paper doesn’t melt the wax properly
- How to fix it: Use genuine wax paper for best results
6. Choosing Only One Shade of Blue
- Why it’s a problem: Results look flat or less visually interesting
- How to fix it: Use multiple shades of blue and mix in white or turquoise for contrast
🧩 8 Side Activity Ideas to Pair with This Craft
Make your crafting session more engaging by incorporating complementary activities. These add educational value and extend the fun!
1. Blue Color Scavenger Hunt
- Let kids search the room or backyard for blue objects after finishing their suncatchers.
2. Weather-Themed Story Time
- Pair the craft with books about the sky, water, or rainbows.
3. DIY Painted Rock Garden
- Have kids paint small rocks in blue patterns for a matching garden art project.
4. Tissue Paper Sun Art
- Create additional light-catching art using tissue paper and clear contact paper.
5. Watercolor Experimentation
- Introduce watercolors and let kids experiment with blending shades of blue.
6. Sunlight Science Experiment
- Teach about how sunlight passes through colors using your finished suncatchers.
7. Make a Matching Mobile
- Combine several suncatchers at varying lengths and suspend from a stick or hanger.
8. Create a “Sky Wall”
- Decorate a wall or bulletin board with cutouts of clouds, stars, and your blue suncatchers for a themed display.
💡 Why These Additions Matter
Adding side activities and avoiding crafting errors ensures that blue crayon suncatchers remain a fun, educational, and safe experience. These ideas promote creativity, boost engagement, and let children express themselves while learning basic principles of art and science.
Storage, Pro Tips, FAQs, and Final Thoughts on Blue Crayon Suncatchers
🧠 Pro Tips for the Best Blue Crayon Suncatchers
Want to make your blue crayon suncatchers look amazing every time? These expert tips will help you get it right—whether it’s your first craft or your fiftieth:
- 🟦 Blend multiple shades of blue like sky blue, navy, and turquoise for a layered, sky-like effect.
- 💨 Avoid steam when ironing—use a dry heat setting to prevent bubbles or warping.
- 📐 Use cookie cutters as stencils for perfect shapes like stars, raindrops, or flowers.
- 📎 Press your wax sheets flat under a heavy book (after cooling) if they start to curl.
- 🧵 Use transparent fishing line instead of string for a floating visual effect.
- 🎨 Decorate with metallic markers after cutting to add shimmer and outlines.
📦 How to Store Your Blue Crayon Suncatchers
Preserving your creations ensures they last beyond the season. Here’s how to store them properly:
Short-Term Storage
- Stack between wax paper sheets and place in a flat folder or envelope.
- Store in a cool, dry place to avoid softening or bending.
Long-Term Storage
- Laminate your cut shapes (optional).
- Place inside a plastic sleeve or rigid mailer for flat, safe keeping.
- Label by season or year to make a keepsake collection!
🔁 Reheating and Fixing Crumpled or Bent Suncatchers
Although you won’t usually need to reheat your blue crayon suncatchers, here’s how to fix them if they bend or warp:
- Sandwich the shape between two sheets of clean wax paper.
- Use low heat and gently press again with an iron.
- Lay flat under a heavy book until cool.
❓ Frequently Asked Questions (FAQs)
Here are answers to the top questions people ask about blue crayon suncatchers, based on the “People Also Ask” results from Google:
Q1: Can I use other colors besides blue?
A: Yes! You can make suncatchers in any color. Blue is popular for its calming, sky-like effect, but feel free to mix it with purples, pinks, or greens for variety.
Q2: Is wax paper the same as parchment paper?
A: No. Wax paper is coated and designed to melt crayon shavings smoothly. Parchment paper won’t hold the wax the same way.
Q3: How do I keep the wax from leaking out during melting?
A: Make sure your wax paper sheets fully overlap and extend beyond the crayon shavings. Press lightly with the iron and move slowly to prevent overflow.
Q4: Can kids do the ironing part themselves?
A: No. The iron should only be used by an adult. Children can safely handle all other steps, including shavings, cutting, and threading.
Q5: How long do the suncatchers last?
A: When stored properly and kept out of direct moisture or extreme heat, blue crayon suncatchers can last several months to a year or more.
Q6: What if I don’t have an iron?
A: You can use a hair straightener (on low heat) with supervision, or melt shavings in the oven between two glass baking dishes lined with wax paper.
Q7: Can I add glitter or sequins?
A: Yes! Sprinkle a little glitter over the shavings before melting. Don’t overdo it—too much can block the light.
Conclusion: A Bright and Simple Craft to Light Up Any Day
Making blue crayon suncatchers is a delightful way to recycle old crayons, create something beautiful, and engage kids in hands-on creativity. They’re budget-friendly, beginner-friendly, and a wonderful addition to any window.
With the tips, variations, and FAQs covered, you’re ready to craft your own colorful collection. Whether for a classroom, rainy day project, or seasonal display, this DIY art activity is guaranteed to bring light and joy into your space.


Leave a Comment