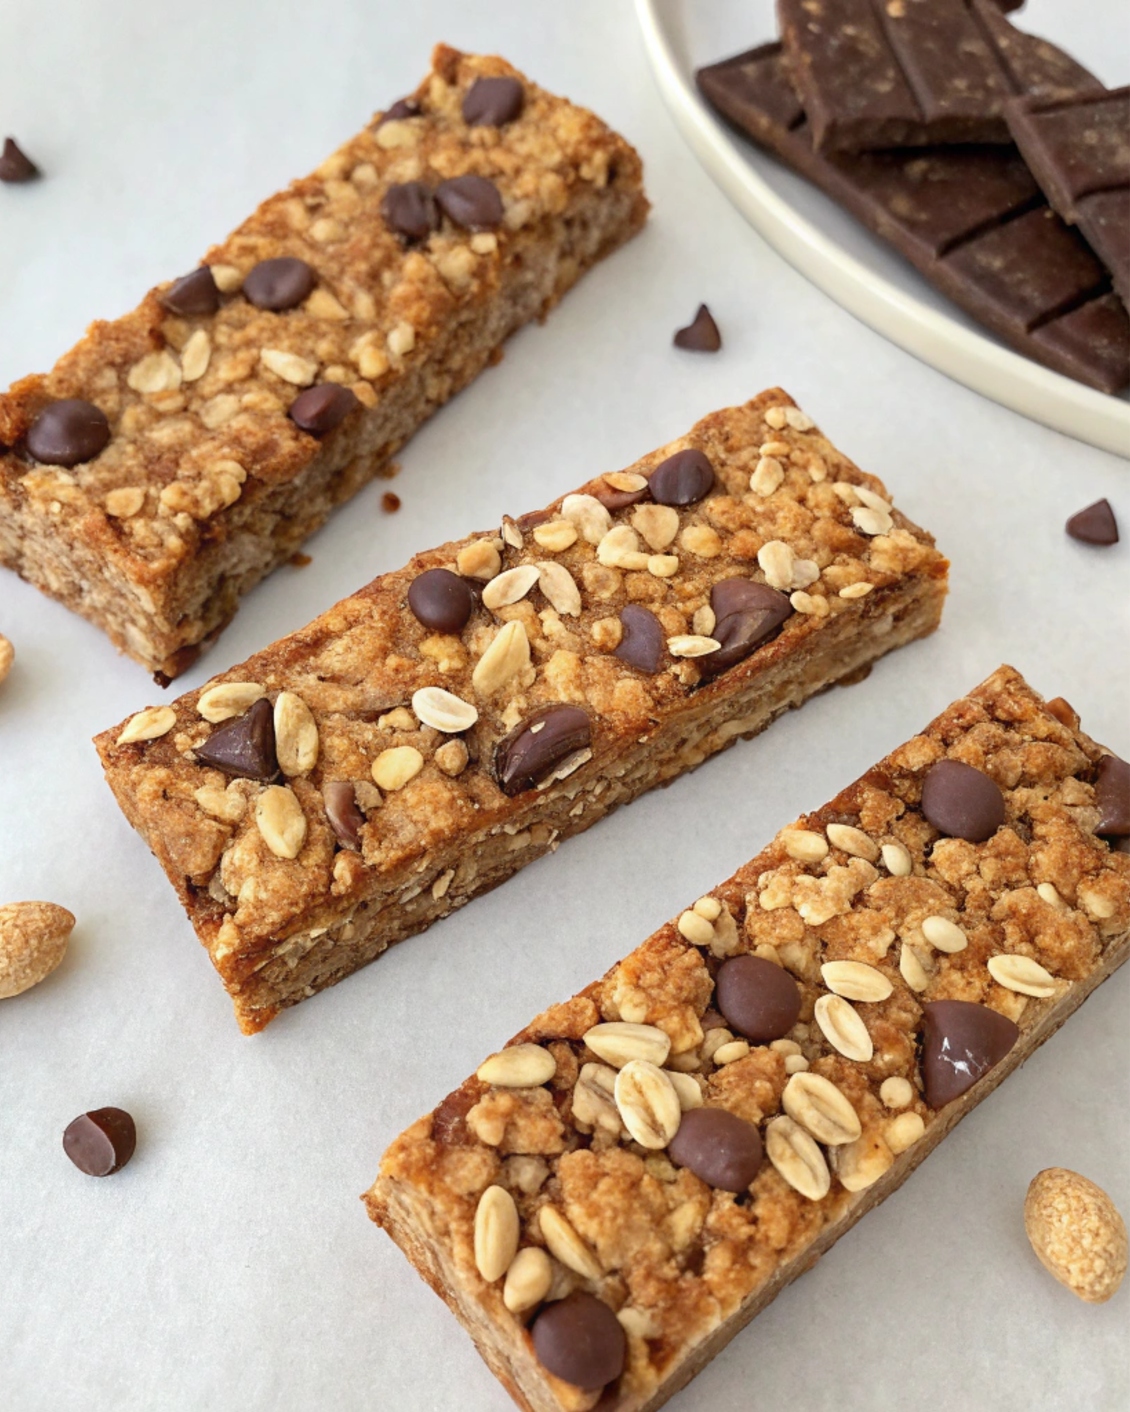
Healthy No-Bake Peanut Butter Chocolate Granola Bars are the perfect blend of indulgence and nutrition. These chewy, satisfying bars combine wholesome oats, creamy peanut butter, and rich dark chocolate—all without the need for baking. They’re a convenient, portable snack that feels like a treat but fuels your day with clean energy.

This is an ideal recipe for anyone who wants to eat clean while still enjoying something sweet. Whether you’re meal prepping, packing school lunches, or looking for a post-workout bite, this snack fits the bill. It’s naturally gluten-free, dairy-free, and easily vegan-friendly.
Why You’ll Love This Recipe
These bars check all the boxes:
- No oven required — completely no-bake
- Quick prep — ready in under 15 minutes
- Naturally gluten-free and dairy-free
- Refined sugar-free — sweetened with honey or maple syrup
- Fully customizable — adjust ingredients to fit your lifestyle
Perfect for:
- Busy mornings and on-the-go breakfasts
- Healthy school snacks
- Pre- or post-workout fuel
- Guilt-free desserts
Tip: Make a double batch and freeze half for later.
Preparation Phase and Tools to Use
These no-bake granola bars are simple and quick to prepare.
- Total time: 10–15 minutes prep + 1 hour chill time
- Skill level: Beginner
- Equipment needed: Basic kitchen tools
- Cooking: None
Prep Tips:
- Slightly warm the peanut butter and sweetener for easier mixing
- Use parchment paper to avoid sticking
- Press the mixture firmly into the pan to ensure bars hold together well
Essential Tools and Equipment
You’ll need a few basic tools for this recipe:
- Large mixing bowl
- Medium saucepan or microwave-safe bowl
- Rubber spatula
- 8×8-inch or 9×9-inch square baking pan
- Parchment paper
- Measuring cups and spoons
Importance of Each Tool
- Mixing bowl: Allows you to evenly coat the oats and mix-ins
- Spatula: Helps mix and press the mixture firmly into the pan
- Baking pan: Shapes the bars to the perfect size
- Parchment paper: Prevents sticking and makes lifting bars easy
- Measuring tools: Ensures accurate proportions for consistent results
Pro tip: Use the bottom of a measuring cup to press the mixture flat and even.
Ingredients List
Main Ingredients
- 2 cups rolled oats (certified gluten-free if needed)
- ¾ cup natural peanut butter (creamy or crunchy)
- ⅓ cup honey or pure maple syrup
- 1 teaspoon vanilla extract
- ½ cup dark chocolate chips (dairy-free if needed)
- Pinch of sea salt
Optional Add-Ins
- 2 tablespoons chia seeds or ground flaxseed
- ¼ cup unsweetened shredded coconut
- ¼ cup dried fruit (raisins, cranberries)
- 1–2 scoops protein powder
- Chopped nuts or seeds (like almonds, walnuts, or sunflower seeds)
These optional ingredients help you tailor the recipe for added nutrition, flavor, or texture.
Step-by-Step Directions
1. Line the Pan
- Line an 8×8 or 9×9-inch pan with parchment paper.
- Leave a bit of overhang on the sides for easy lifting later.
2. Combine Dry Ingredients
- In a large bowl, mix:
- Rolled oats
- Salt
- Chia seeds or flaxseed (if using)
- Other dry mix-ins like protein powder or coconut
3. Heat Wet Ingredients
- In a medium saucepan (or microwave-safe bowl), combine:
- Peanut butter
- Honey or maple syrup
- Vanilla extract
- Gently warm until smooth, stirring often.
- Do not let it boil — just heat enough to mix easily.
4. Combine Wet and Dry
- Pour the warmed peanut butter mixture over the dry ingredients.
- Stir until fully coated and evenly mixed.
5. Add Chocolate Chips
- Allow the mixture to cool slightly before adding chocolate chips.
- Fold in gently to avoid fully melting the chocolate.
Tip: If you prefer a clean chocolate layer, skip this step and melt chocolate to drizzle on top instead.
6. Press into Pan
- Transfer the mixture to the prepared pan.
- Use a spatula or the back of a spoon to press the mixture firmly and evenly into the pan.
7. Add Optional Chocolate Drizzle
- Melt extra chocolate chips (microwave or double boiler).
- Drizzle over the top or spread as a smooth layer.
- Add toppings like chopped nuts or coconut if desired.
8. Chill to Set
- Refrigerate for at least 1 hour, or until firm enough to slice.
9. Slice and Serve
- Lift the bars out using the parchment paper overhang.
- Cut into 12 even bars (or more, depending on your preferred size).
- Store in the fridge or freezer for later.
Tips and Variations
- Too soft or sticky? Add ¼ cup more oats.
- Too dry? Mix in an extra tablespoon of peanut butter or sweetener.
- Want more texture? Add chopped nuts or crisped rice cereal.
- Going vegan? Use maple syrup and dairy-free chocolate chips.
- Nut allergy? Substitute with sunflower seed butter or tahini.


Leave a Comment